
Feed A Mosquito Boss Fight Guide: How to Beat Boss Mosquitoes
A repeatable Feed A Mosquito boss fight walkthrough: build health, bring a better weapon, outlast the boss, and collect the larvae it drops.
Documented boss fights in Feed A Mosquito all run the same repeatable loop: build health at your base, bring the strongest weapon you can afford, walk up to the boss mosquito standing in the field, and keep hitting it until its health bar at the top of the screen reaches zero. Larvae fall to the ground when it dies — pick one up, hatch it at your base, and it becomes your next money-making mosquito. You can turn around and fight the same boss again immediately, and this loop is the game's designed way to earn eggs.
Here is the full winning sequence, the preparation that actually gates each encounter, and how strong you needed to be for each named boss in documented playthroughs.
How to start a boss encounter
There is no summon ritual or arena. Bosses are simply the large mosquitoes standing in the way around the map — walk up to one and attack it with your equipped weapon. Two things happen at once:
- The boss's health appears in a bar at the top of the screen. That bar is your win condition: keep hitting until it reaches zero.
- The boss fights back. Every hit it lands drains your health — the same health-blood you use to feed your base mosquitoes — and it drains fast.
So every encounter comes down to one question: can your health pool outlast the boss's bar while your weapon chips the bar down?
Preparation: health first, weapon second
Health is the real gate. Your health serves two purposes — it is the blood you feed your base mosquitoes with, and it is your resistance in field fights. You build it by sitting at your base's life-gain spot, and it refills automatically over time after fights and feedings, so preparation is never permanently spent.
The life-gain seat itself is upgradable through a chain of furniture — starting chair, toilet, vase, bathtub, bench and bed — and each tier raises how much health you gain per second. One run's bench seat produced 40 health per second, which is what made repeatedly tanking late-game bosses realistic. If you are stuck before a boss, the documented fix is almost always more seat time, not a new technique. The upgrade chain and its costs are covered in the base upgrades guide.
Weapons come from the cash shop and scale hard. You start with a traditional hand slap. Documented runs then moved through a shoe, a broom (35,000 cash), a baseball bat (150,000) and a frying pan (500,000), before reaching an electric swatter and a kukri. The shop also lists a pot, sword, axe, hoe, katana and scythe, plus a mosquito spray that is Robux-only — 10 million damage for 1,000 Robux — which matters at the very top; more on that below. The full lineup is on the weapons list.
Cash feeds both tracks — weapons and seat upgrades. If you want extra fuel for the grind, current gift codes are kept on the Codes page.
What a fight looks like in practice
No documented boss in these playthroughs used attack patterns, phases or special cues — the only observed offense is damage that drains your health on each hit. The practical fight reads like this:
- Engage. Run to the boss and start attacking with your equipped weapon.
- Watch two bars. The boss's health at the top of the screen, and your own health pool.
- Retreat if your health is melting. One player with a new broom could out-damage a mosquito showing 2,000 health on its bar but lost the exchange anyway, because "every hit he lands on me, my health drains really fast." The answer was sitting longer at the life-gain seat with the same broom — a bigger tank, not a different action.
- Upgrade the weapon to shorten the fight. After buying a simple shoe, the same field mosquito went down "much easier."
You can also die mid-encounter: one player at electric-swatter tier kept getting killed while looting the Fman's dropped larvae. Leave a health buffer before you engage, and more still before you stop to pick up rewards.
How much you need for each named boss
The names below were coined by the creators of two playthroughs, not by the game's official text, and each threshold is a single-run observation — treat them as ballparks, not stats. What they consistently show is that survivability, not technique, decides each fight:
| Boss (creator name) | What one run showed | What the win took |
|---|---|---|
| Housewife | An early wall — the player retreated: "I don't think we can take that one yet" | Around 500 health, "probably a little bit more"; later killed trivially once the player was stronger and owned the frying pan |
| Punk | Needed a large health pool first | Roughly 15k cash farmed into health upgrades before engaging; its hatched egg later paid $45 per second |
| Clown | Mostly out-tanked — "a little bit of damage. Not that much" | High max health from the upgraded life-gain seat |
| Crazy scientist | "He's doing a lot of damage, but I'm sure we can withstand this power" | High health plus a stronger weapon; the player farmed it repeatedly for eggs |
| Fman (fighting mosquito) | "You're too strong for me, man" on the first try; it carries a sword | Electric-swatter-tier weapon and high health; deaths still happened while looting its drops |
| Yeti | "I can't get close to him... He's just too big" — advice given: survive at least one hit | Roughly 150,000 player health to tank it — at that point "this thing doesn't do anything to us anymore" — or the 10-million-damage mosquito spray (1,000 Robux) |
Exact boss health values, drop rates and respawn timers are not documented, and beyond tanking your way up no free route through the highest bosses is documented. The spray is a paid shortcut option, not a proven requirement.
The reward: larvae on the ground, then again
Every documented kill ends the same way: larvae fall on the ground where the boss died, and you choose one — "Some larvae will fall here on the ground and I'll have to choose the best one." What happens next:
- Hatch it at your base. Carry the larva back, place it anywhere, and wait out the timer — about 7 seconds for a common larva, while bigger ones take longer (late-game timers of 40 minutes and multiple hours show up in the endgame).
- Feed it to raise its payout. A hatched mosquito starts paying roughly a tenth of its maximum ("if it pays 100, it will start by paying 10"); feeding it your blood pushes it toward the full rate.
- Expect randomness in quality. Repeat kills produced common, rare, epic, mythical and legendary larvae, with quality behaving as a random per-drop result — bad rolls happen. Whether every kill is guaranteed a drop, and what the odds are, is not documented.
- Loot other players' kills. Larvae that fall from someone else's boss can be grabbed by anyone: "Other players can defeat the mosquito and I just go by picking up the larvae that fall along the way."
- Repeat immediately. The same boss is fightable again right away — "Let's go defeat this mosquito one more time" — and both creators farmed the housewife, crazy scientist and Fman back to back for more eggs.
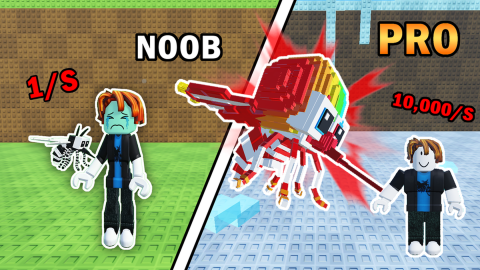
What to do with eggs once they hatch — slots, hatching timers and the feeding economy — is covered on the mosquito eggs page, and squeezing more income per minute out of the loop is the job of the egg farming guide.
The V2 caveat
The live game is [V2] Feed A Mosquito by Be Diao VIII, and Update V2 added new weapons and a boss, opened a PVP zone, and added damage and speed upgrades. The boss names, survivability thresholds and weapon prices above come from creator playthroughs rather than official documentation, so treat all of it as version-sensitive: when V2 bosses or weapons change, recheck your survivability before committing to a fight. Patch history is kept on the updates page.
Pick your next fight
Learn the loop once and every boss uses it — the only real decision left is which encounter your current health and weapon can actually clear. The boss list breaks down what is out there so you can choose your next target, and the beginner guide covers the first hours if you are still building your base.
Related Guides
Every Identified Boss
Meet all six identified boss mosquitoes, how to recognize each, and the gates behind them.
Which Weapon to Buy
Compare six verified weapons and pick by goal, budget, and health instead of a guessed tier list.
Mosquito Eggs and What They Do
Find out which mosquito eggs are confirmed, how boss drops work, and what hatches from each.
Repeatable Egg Farming Route
Run the repeatable boss route: bank health, beat field bosses, hatch dropped larvae, and re-fight.